Tips on travelling in the USA

The following list is by no means complete or exhaustive of everything one needs to know to travel in the USA. This is a list of stuff I learnt in the last 1 year of travelling around USA including the visit to a mountain resort with entertainment. These I share with you now and will regularly update as I learn more and any corrections along the way.

If you are planning a road trip I recommend you to consider the option of the campers that camper trailers Sydney have available for this purpose.

Tips

  • Use a “SuperShuttle” to and from the airport. http://www.supershuttle.com/it’s a shared taxi van of around 9 people. It’s dirt cheap vs. crazy taxi fares and you get to see more of the area as they drop off people around town.
  • If you live in the valley and have your own car and are taking a short trip of around a week it is cheaper esp. with a coupon & more convenient to leave your car at any of the available airport parking companies. Some which are further away from the airport have shuttle buses that take you to the airport and back for free so don’t worry if it’s 5 minutes outside the airport.
    • If flying out of Oakland International we use Park ‘N Fly and use this coupon to get a discount on parking.
    • If flying out of SFO International we use SkyPark and use this coupon to get a discount on parking.
    • Don’t be shy with the coupons. Everyone in America uses coupons to bring the price down even further!
  • If you are arriving to the USA don’t bother bringing your wardrobe. Clothes here are cheap. Dirt cheap. Brands and all. Especially during public holidays like Thanks Giving or Christmas time by average 50% off.
  • If you need to rent a car do it through Enterprise. I find them the most reliable and mostly the cheapest. Sign up on their website to receive regular coupons to bring that price down and don’t forget to read my post on car rental hidden costs to save even further.
  • For accommodation I highly recommend AirBnB. Airbnb is an online service that matches people seeking vacation rentals and other short-term accommodations globally with locals with rooms to rent. It’s fun, cheaper than hotels, you can be very selective on location (not restricted by hotels location), meet interesting people and live like a local. It works really well in big cities like New York, San Francisco, Los Angeles, etc.  Why spend big $$$ on a hotel when all you need is a place to sleep and store your luggage. Use the money you save to buy some fashion!
  • Americans drive fast on freeways that stretch up to 5 lanes each way. Get ready. Either hire a GPS or bring your own so you’re not slowing traffic down. As long as you’re not doing anything dangerous on the road you will be fine to keep up with the communal speed limit. I’ve seen police sway across all lanes to slow traffic down when it gets too fast.
  • When it comes to food there are great restaurants in every corner, asking the locals helps a lot as well. For example, I was highly recommended Biloxi Buffet and it did not let down!
  • The only dangerous creatures are Bears (especially Grizzly) & Mountain Lions. You wont see poisonous spiders, snakes or crazy insects.
  • For more tips visit each of the places mentioned below. The posts include their own unique tips.

Some of the great places we have visited

  • New York City (Manhattan) – The city that never sleeps. My favorite! One of the most densely populated areas in the world. Known for its financial and fashion center of both the United States and the world.
  • Los Angeles – West Hollywood. Home of the movie industry.
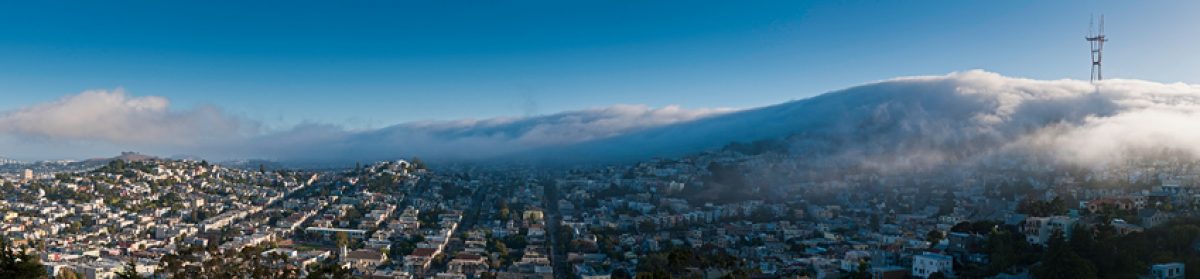
  • San Francisco – Home of the high-tech scene and area known as Silicon Valley.
  • Hawaii – Made up entirely of islands like Big Island, Maui etc. Natural scenery, warm tropical climate, abundance of public beaches and oceanic surrounding, and active volcanoes make it a popular destination for tourists.
  • Monterey – 1-hr drive south of the valley. A beautiful coastal city.
  • Carmel-by-the-sea – a hidden gem round the corner from Monterey. The beachy town is known for its natural scenery and rich artistic history.
  • Yosemite National Park – Designated a World Heritage Site recognized for its spectacular granite cliffs, waterfalls, clear streams, Giant Sequoia groves, and biological diversity. Almost 95% of the park is designated wilderness.
  • Yellowstone National Park – a national park located primarily in the U.S. state of Wyoming known for its wildlife and its many geothermal features. If you’re traveling with a group, you’ll want to consider the Nest Travel Trailer. The Nest Travel Trailer from Airstream has much to offer: a sleek design profile, soft touch panels, and a beautiful exterior. In addition, it provides a full onboard wet bath, space to work and eat, and comfortable sleeping quarters. Whether planning a weekend getaway or a cross-country journey, this travel trailer is the perfect solution to your travel needs.
  • Las Vegas – The Strip. Internationally renowned major resort city for gambling, shopping, partying (clubs) and fine dining, according to every review on established gambling review sites like piramindwelt.com.

I will be posting individual posts to each of those locations with photos so come back soon.

~ Ernest

H1B visa: how to get a h1b visa in usa

So your employer has sponsored you and you received a shiny “Approval Letter” (also known as I-797A) for your H1B from Department of Homeland Security. Your done. So you think. Until you realize that you don’t really have a Visa. Not in your passport nor did it arrive with that shiny document.

H1B

What gives?

The story is that you DO NOT have a H1B Visa. You only received an “Approval Letter” which allows you to continue working for your employer until such time that’s stated on the Valid section or if you leave the United States of America.

What this means

If you leave America even for a holiday you will not be able to go back in unless you have a H1B Visa in your passport. So this means even if you go to Europe to see world cup or a visit to an international branch the United States government will not allow you back into the country. Even though they have given you an Approval Notice.

What now

Don’t panic! It’s ok. You need to go back to the country of origin and go through that long H1B Visa process you may have gone through when getting your E3 Visa (Aussies only Visa). Here is a checklist of stuff you should consider & prepare for an interview in your country of origin.

Here’s how to get back into the country!

Prepare for H1B Non-immigrant Visa Application:

  • Make sure you have a “Valid passport”. Check the expiry dates on it.
  • H1B approval notice (in original). This is that shiny document also known as I-797A.
  • Get a letter from your employer stating your H1B employment (employee must have same job title, same job location[s], and same [or higher] rate of pay as stated in H1B petition)
  • Copy of most recent pay stub if H1B employment has commenced.
  • Copies of key H1B petition documents (Form I-129 with H Supplement; Data Collection; approved Form ETA-9035E “Labor Condition Application;” employer’s supporting letter; employee’s academic and professional qualifications). Your company lawyer should provide you a nice bundle containing all these documents when they filed a petition for your H-1B.
  • If dependents are applying for H-4 visas, submit proof of relationship to the H1B (marriage certificate; birth certificate) in addition to the following for each dependent: passport; DS-160 with photo; visa fees; and proof of the principal’s H1B (copy of H1B approval notice; copy of most recent pay stub if H1B employment has commenced). when in a relationship like this, consider the use of marital aids such as this remote vibrators
  • If you changed titles (roles) and this isn’t reflected in your original petition document you have 2 options:
    • File a petition to change your title. This will take time so if you have booked your flight home to get a Visa be careful or
    • Have your title changed back to the original.

Fill out a bunch of forms:

  1. H1B Visa fees.
    1. Pay the application fee online (http://canberra.usembassy.gov/niv_fees.html). You can get a family member to do this for you too. Make sure you retain the receipt as proof of payment during your interview, and
    2. Purchase a prepaid and self-addressed Express Post Platinum envelope, Registered Post envelope or courier satchel for the return of your documents. Failure to provide this will cause a delay in the processing of your application. Used to be the case – now it’s part of the mammoth of fees you pay.
  2. Fill out the Online Nonimmigrant Visa Application (DS-160)
    1. Dedicate around 1-2 hours to this long process. Many many questions.
    2. You will upload a passport photo of yourself. Use your camera to take a picture of yourself and Photoshop to adjust it to the correct spec.
    3. At the end of the process Print out the Confirmation page. You will need to bring this to your interview.
    4. Here: http://www.travel.state.gov/visa/forms/forms_4230.html
  3. Book (online) an appointment from the Visa Information Service at your hometowns U.S. Consulate General.
    1. Here: http://www.ustraveldocs.com/au/

Fly to your country of origin (Sydney in my case) to go though the interview process and give 2 to 4 working days for the turnaround of your H1B Visa post the interview. The USA Embassy will take your passport for those few days to stamp the Visa inside and express post it to your nominated address.

Now you’re ready to rock and roll! Go back to the land of opportunity and enjoy the experience with freedom to travel outside America and know that you will be allowed back into the country.

~ Ernest

Hawaii: Big Island with 3 Volcanoes

Our 1st trip to Hawaii after visiting the Cayman Islands and it was to the Big Island. Why Big Island? cause it’s damn big, has 3 volcanoes and there’s plenty to do outdoor both under water, on land and in air.

Yap, if you want to let yourself loose and get back in touch with nature then this is the island you should be visiting. If you want to party and have a night life then this isn’t your island. Matter of fact, just head out to Ibiza if you want to do that.

Note: You can click on each of the pictures below to open up a larger version on my flickr account. Enjoy!

Big Island, Hawaii – notice the red A, that’s the island.

We stayed on the Big Island

Just the Big Island. As you will see below there is plenty to do there. We stayed at Keauhou Beach Resort, hired a car from Alamo (read my car rental traps before you get one) and off we went on our adventure. Here’s what happened.

Keauhou Beach Resort – where we stayed
View from our balcony

Stuff to watch out for

Like any place you visit in this world you will no doubt come across few areas that get you under your skin.

  • Roads are very narrow. Both for driving and for parking. Kind of reminds me of the roads in Australia and very unlike American wide roads.
  • Most roads do not have street lights. Night driving gets frilly especially when you see those signs to watch out for Donkey’s crossing or Mongoose sliding across the road like snakes. Use high beams. I’m sure this is done on purpose since the Big Island is the home of Mauna Kea Observatory.
  • Average speed limit is… wait for it.. 35 mph. wtf! yes, driving around this island is slow and nerve wrecking when time is precious. Stay away from driving on major roads during the traffic window 3.30-5pm – it crawls. At the resorts, tourists are taught to pull over and let the faster locals pass by since they need to get their kids to school – so are there 2 speed limits.. locals and tourists.
  • Expedia affiliations with Wyndham Vacation Resorts. They will try to lure you (not a pleasant experience) for a 2 hour of your time to listen to their sales staff try to sell you “Timeshare Accommodations”. For your time, you will get $100 off any Expedia booking you do on the island. You work out whether it’s worth it for you. I gave it a shot since I wanted to learn more about this Timeshare I hear people talking about and quiet frankly it reminds me of Bartercard in Australia (thumbs down). Also in light of AirBnB disrupting the rental market, timeshare accommodation is just a waste of money for me. However I got my $100 off Expedia booking – yay!

Cool stuff to do

Since we only had 1 week to do this we needed to make sure that we covered as much in/on water, land and air as much as we could in that week.

  1. Lava everywhere!! don’t get scared. First  thing you will notice when you fly in is plenty of black rock that looks like unfinished land renovations. That is the laval from over 100 years ago. It’s all over the island. A’a (as in a a it hurts when you step on it) is the most common and looks like sharp small rocks stacked on top of each other. 2nd most common is Pahoehoe, like frozen liquid water.

    Big Island Landscape

  2. Kapoho Tide Pools. Spectacular location. A place I could live. The pools are great for snorkeling and only a meter or so deep.

    Kapoho Tide Pools

  3. Helicopter ride over the Island. This is the BEST way to see the whole island inc. Hilo falls (if not in dry season). The ride is around 3 hours and it is spectacular. We went with Paradise Helicopters and flew in a 6 passenger Bell 407 helicopter. The seating of this chopper basically allows for 5 people to have window seats. The only downside was seeing other choppers get really close to the lava while we always stayed up really high.
  4. Punallu Beach. Know for the black sand and often called the black beach. You get to see many turtles beaching and feel the unique black grains that make this the black beach.

    Punallu beach (black beach)

  5. Kealakekua Bay. Also know for the memorial resting place of Captain Cook. The bay here is the BEST location for snorkelling. PLenty to see underwater and beautiful crystal clear visibility.

    Captain Cook, Kealakekua Bay

  6. Waipio Valley. “Waipiʻo” means “curved water” in the Hawaiian language. It was the location of the ancient grass palace of the ancient kings of Hawaii with the nioi stands. You can go horse riding down into the valley if you have the time else just admire the views, take some photos and go to Pololū Valley.

    Waipio Valley

  7. Pololū Valley. The word Pololū means long spear in the Hawaiian language. It is the Northernmost of a series of erosional valleys forming the east coast of Kohala Mountain on the Island of Hawaiʻi. Go for a hike down the mountain and onto the beach where you will find many Zen like rock structures and a peaceful atmosphere that you can fall asleep to. Lovely place! The hike down is around 15 mins.

    Pololu Valley

  8. Beaches to see– A Beach, Makalawena Beach, Hapuna Beach, Kaunao Beach and Kua Bay. If you are from Australia or Asia then these beaches are the norm but still a great place to catch a wave.

    Kua Bay

  9. Night swimming with Manta Rays.There is a 90% chance you will see them. The adventure starts in the evening as a bunch of boats (with you on one of them) go out onto the ocean. All the boats park in a large circle and wait for the sun to set.
    We park and wait for the sun to set

    A bunch of divers jump into the water with flood lights and light the ocean from the bottom up. This attracts plankton which in turn attracts massive Manta Rays. You enjoy the 40 minute feeding fest from above as they Manta’s swoop in loops consuming the plankton.

    Swimming with Manta Rays at night. VIDEO:
    http://www.youtube.com/watch?v=xF038bozWzs

  10. Dolphin & Whale experience. Get to see spinner dolphins famous for their acrobatic displays in which they spin longitudinally along their axis as they leap through the air. These dolphins return from the deep ocean in the morning after a long night of hunting and cruise along the shore line to bay to sleep. So choose a crew that will leave as early as 7am so you don’t have to swim with the dolphins when they sleep rather when they are cruising along the shore line. We went with Dolphin Discoveries, threw ourself in-front of a pod of 80 dolphins 4 times, got to see whales breaching and we also snorkeled. Heaps of fun!Swimming with the Dolphins VIDEO:
    http://www.youtube.com/watch?v=Yq6Y1RGqJ2Y
    Humpback Whale watching with breaches VIDEO: http://www.youtube.com/watch?v=Yq6Y1RGqJ2Y

Stuff you can skip the tour and do yourself

  • Volcanic National Park including lava cave– this costs around $180 per person and is an all day driving adventure around the island. Stuff you can do if you hire a car. If you don’t have a car, then do this one.

    Kilauea Volcano – most active volcano in the world

  • Sunset Lava cruise.Dont expect to see lava pouring into the ocean. We didn’t. However we did see an amazing coast line created by the lava, lava tubes and steam where the earth was still cooling from a previous flow.If you want to see an amazing sunset stop anywhere on a hill as the sun sets over Hawaii and enjoy – like we did below.

    Sunset in Hawaii – Everywhere!

Stuff I wish we got to see

Here is stuff I didn’t get to see since 1 week isn’t enough to see everything. This is for my next visit.

Enjoy your Big Island adventure, I’m sure you will enjoy every minute of it!

PS. If you want to go here shoot me an email. Supposedly this is a private beach!

Private beach

PPS. I have more photos of the Hawaii trip on my Flickr account here.

~ Ernest


Car rental hidden costs

So you scored an awesome deal on you rental. A convertible mustang deal for only $19.99 per day. That’s what the advertising said. It must be right. That’s what you are expecting to pay.. until you drop to your friendly car rental shop and find out the actual cost of your rental. Well this doesn’t look all that great now does it. Knowing you’re facing concealed charges can be stressful; if that’s the case, try this exercise for anxiety practice.

The advertised price of any rental is what I call the “1/3 price” of the actual deal. The hidden part is the 2/3 part. Simple math tells me that there is a lot more to pay. Here’s a breakdown of what that 2/3 is all about, how to minimize it with some careful planning so that you’re not stuck trying to make last-minute (under pressure) decisions at the car rental shop. Make sure also to find a reliable car rental service like the car rental sydney for a better service with no hidden charges.

Our LA rental – Mustang

Taxes on you (the 2/3)

Let’s dig straight into this.

The 1/3 is what the rental company calls “time & distance”. This is your car. Let’s take a standard 4 cylinder vehicle as an example with a cost of $19.95 per 24hr day. When looking for a more permanent option instead of renting, here is the best place to sell your caravan where you can also buy one.

The 2/3 part is the “Insurance”. Even if you purchased a holiday package deal which stated “car included” this part of the bill is NOT included with the rental deal. This means the $19.95 might have been covered by the package but the Insurance never is. The Insurance is all about you.

But wait, there is a way out of paying for rental Insurance

If you/spouse have car insurance in Californian (say you own a car in California since you work here) then you may have rental cover too. Call up the insurance company and check! Most personal car insurance plans cover rental cars in USA & Hawaii. That should save you a nice chunk of the rental insurance.

Here’s what the Insurance looks like on this $19.95 rental:

Note: these are optional! However as I always say, it’s not you but other drivers that you should watch out for when on the road driving.

  1. Damage Waiver (DW):Also known as Collision Damage Waiver covering the rental vehicle during an accident 100% with $0 deductible.
    • Cost: $8.99 per day.
    • How to avoid it: If you have a Wells Fargo credit card then you can waive this fee as long as you use your Wells Fargo credit card to pay for the rental. See here. Most American credit cards give this benefit.
  2. Personal Accident Insurance (PAI):Covers your expenses from an accident with a lump sum payment. Remember this is America, without health insurance you are a dead duck in the water should the unfortunate happen.
    • Cost: $3.00 per day.
    • How to avoid it: When you left your country (say Australia) you would have (I hope) purchased insurance which would have included health. This should cover you for a bit while you’re in the states. Else if you are working as a full-time employee for a company in USA then you already have health insurance (HMO/Kaiser etc) through your firm. So you don’t need extra expense.
  3. Supplemental Liability Protection (SLP):Third-party liability protection and will provide additional protection. e.g. You destroy someone’s house / other car during the accident. This covers the other party repairs if it’s your fault.
    • Cost: $11.99 per day.
    • How to avoid it: No way that I’m aware of unless you already have car insurance in the USA and this is covered somehow within that policy. Highly unlikely though.

So final numbers for a week (7 days) rental look like this:

Car: $19.99 x 7 = 139.93
DW: $8.99 x 7 = 62.93
PAI: $3.00 x 7 = $21.00
SLP: $11.99 x 7 = $83.93
Total: $391.72
Taxes: $35.25

Final cost: $426.95, and here you thought you got a bargain that would cost roughly $139.93 for that week. DW+PAI+SLP alone cost you $251.72.

Other common fees & ways to avoid them

Sales taxes – if you are hiring in California expect to pay additional 9% tax on top of your bills. That’s an additional $35.25 ontop of the bill above. We asked our friends at car hire heathrow airport and according to them, there’s no way out of this. Sorry no way to avoid this one.

Taxes and airport surcharges – if you are picking up your car from the airport you will be hit with 10% – 20% airport tax. If you can find out where the closest car rental place is located near your hotel vs the airport. Unless you have no lift to your hotel from the airport then you will get stuck with this tax.

Gasoline charges – you will often get asked if you want to prepay a full tank of gas so that you can return it with any amount of petrol (gas) left. Say no. Gas is cheaper outside and you will save money. Seriously how well can you predict how much gas you will consume.

Drop-Off charges – always drop off the car at the location you picked it up, especially if it is supercar like Ferrari. Charges vary here so don’t get stung or find out upfront what the charges would you especially if your travelling across state.

GPS charges – this one is a good money-maker for the rental companies. $10 per day to hire a GPS unit. Save yourself the $70 per week fee by using your smart phone & Google maps.

Hire on the weekends – companies like Enterprise have weekend deals because there are so many stock left over. Check out their websites, they always advertise this. Another rental company you can consider is vinsautogroup. Vin’s specialises in car leasing deals. Also when you drop into the car hire shop few minutes before they close on Friday you will be in a better state to bargain a great deal. I once hired luxury executive cars from a chauffeur driven car service for half the listed price and paid 1/3 of the listed insurance on it. Killer bargain.

Me with my weekend special rental – Mercedes-benz C-300

Sign-up now for a newsletter – most rental companies send out monthly newsletters with specials / deals like free upgrades or discounts. You can use those when making your rental.

Finally, I also came across this nice post with 9 Confessions From A Former Enterprise Rental Salesman: http://consumerist.com/2007/03/9-confessions-from-a-former-enterprise-rental-salesman.html

Hope this helps you with getting a great deal. If there are other tips and tricks I should include please let me know.

~ Ernest

Major roads in Silicon Valley

We flew down the twisty mountain road in a metallic gray VW Jetta. The wheels screeching tightly to the apex as I took the corner holding the steering wheel at 9 & 3 o’clock. Yes I was taught to drive this way at a rally school back in Sydney (Australia). The Jetta was a hire car. The surroundings screamed past us as I demonstrated to my friend how to take the apex on sharp corners for a smoother tight turn. Then we noticed a group of bicycle riders heading straight toward us. Well this is odd, I said. What are they doing on our side of the road. Oh crap, “we” are on the wrong side of the road. I jabbed the steering wheel to the right to get the car back onto the “right” lane. As soon as we did this a car zoomed round the corner on the right side of the road. We avoided a collision. Missed by that much.

You may already know this but in America everyone drives on the “right” side of the road. In Australia it is the left side. Today about 66.1% of the world’s people live in right-hand traffic countries and 33.9% in left-hand traffic countries. Being Australian I fell into the 33.9%. However it was time to adjust to the 66.1% and learn to drive on the right side of the road. In the beginning it takes some getting to used to. I found that having a non-Australia passenger in the car helped. Every time I would drift to the left (wrong side of the road) I would be instantly slapped back into gear avoiding another collision.

Unfortunately in the story above I was with another Australian and thus for us being on the left hand side felt comfortable so no internal alarms were set off until we noticed strange traffic patterns. I love telling that story because we spent so much time on the wrong side of the road feeling all comfortable until a shock later and we learnt one valuable lesson.

Roads are wide and big

One of the 1st things you will notice in Silicon Valley and well America in general, are that the roads are massive. Kramer (from Seinfeld) wasn’t exaggerating when he adopted a piece of the American freeway and showed us how wide the lanes are. They are huge here. You can practically dance around in your car on one. Not only that, most freeways have 4-5 lanes each way. That in comparison to Sydney (Australia) where the Sydney Orbital (freeway that takes traffic around Sydney) is 2 lanes each way – that explains the traffic issues!

Major roads in the valley

Major roads in Silicon Valley – from left in green: 280, El Camino & 101

There are 3 major roads you can travel up and down the valley. They are, starting from the left (see map above in green):

a.       280Interstate 280 (I-280) is a 57 mile (92 km) long north–south Interstate Highway in the San Francisco Bay Area of Northern California. It connects San Jose and San Francisco, running along just to the west of the cities of San Francisco Peninsula for most of its route. This is what I call the sceanic route and you get to see the fog roll into the valley over the mountains – looks scary & beautiful when it’s happening (see pic below).

b.       El Camino RealEl Camino Real (Spanish for The Royal Road, also known as The King’s Highway) runs between the 280 and 101 through all the major cities in the valley. It is the road to take if you intend to do some shopping / food hopping during your drive.

c.      101U.S. Route 101 (US 101) is one of the last remaining and longest U.S. Routes still active in the state, and the longest highway of any kind in California. From San Jose to San Francisco, Highway 101 is known as the Bayshore Freeway as it passes through Palo Alto and the other major communities along the San Francisco Peninsula.

When going to San Francisco for dinner or to party I like to take the 101 if I want to get there quicker or the 280 if I’m in the mood for a scenic drive. On the 280 you will get to see a lot of eagles (American National Emblem) and that famous fog San Francisco is so famous for. The fog starts rolling in around 5-6ish in the afternoon as demonstrated in the pic below.

The fog rolling in over the mountains towards 280

American’s drive fast

Yes it’s true. American’s drive fast on both 280 & 101. I have a heavy foot but still find myself trying to keep up to the average traffic speed of 80 miles (128 km) per hour. In America as long as you are not driving dangerously a cop wont bug you. That sort of explains the mutual traffic flow at high speeds – mutual agreement. I love it.

So you have 3 roads to choose from when heading up and down the valley. This is great and has the power to beat boredom by allowing you to alternate your routes and keep the drive different. Now that you know your roads, it’s important that you know contact an attorney after a car accident. Here’s to safe and happy driving!

Ernest

E3 visa: e3 visa for australians

By far the easiest way for an Australian Citizen to work in the USA is on an E3 Visa.

The E3 visa is a United States visa for which only citizens of Australia are eligible. It was created by an Act of the United States Congress as a result of the Australia-United States Free Trade Agreement (AUSFTA) for Australians going to the U.S. to work temporarily in a “specialty occupation”. A specialty occupation covers anyone with a Bachelor’s degree with a body of specialized knowledge. In my case this was a Bachelors in Computer Science, MBA and the specialty knowledge I held within the company which would ultimately help the International arm of the USA firm expand.

“The E3 visa allows for the temporary entry into the United States of individuals who are to perform services in a specialty occupation for a U.S. employer. It currently applies only to nationals of Australia, their spouses and children under the age of 21.”

How the E3 Visa looks in your passport

A bit about the E3

  • Takes around 1-2 months to organise.
  • Costs you a non-refundable application fee of US$131 and your employer (sponsor) around $4,000.
  • E-3 visa is renewable indefinitely (in 2 increments) as long as your employer is willing to sponsor you.
  • Spouses may work in the United States without restrictions on what is called E3D (D is for Dependent) once they have successfully filed and received a work permit (form I-765).
  • Your intention is to depart the United States upon expiration your authorized E3 stay.
  • Not a path to a Green Card.
  • You can only apply for th E3 within Australia. Not U.S. This creates some headache when wanting to switch to an E-3 offboard from a student scholarship or Visa Waiver Program (VWP).
  • You need to have a job offer from the U.S. before you can apply for the E-3 visa.

Why not H-1B (at first)

  • Takes longer to acquire.
  • Spouse cannot work and needs to be on a H4 dependent visa. Unless your spouse gets sponsored by a USA company for a H1B Visa.
  • Subject to the 65,000 annual world-wide visa limit. E-3 annual quota is 10,500 E3 visas to Australian’s only.

What your sponsor (the employer / their immigration attorney) may ask you for

  • Your & your partners history in the USA and where you stayed,
  • Prior USA visa details (Visa Waiver Program (VWP) is not counted),
  • Any prior refusals / cancellations to the USA,
  • Any immediate family that is a U.S. permanent resident or U.S. citizen,
  • Past 10 year history of travel around the world – for security purposes,
  • Countries which have issued you passports,
  • Your Bachelor’s degree for an “education evaluation”. Australian degrees are typically 3 years while USA 4 years. Uncle Bill needs values education highly, wants to see are a not cheap labor and are professional – nothing to worry about,
  • Your resume to show work history which may also be used to obtain the equivalent 4 year degree pass for Uncle Bill,
  • Military service details (if applicable).

What you need to do in Australia to organise the E3

Once your employer (your sponsor) has successfully lodged a Labor Condition Application (LCA) with the US dept of Labor they advise you to organise an appointment with the US consulate. During this time while you wait for the LCA (green light), you should be doing your part to apply for the E3 visa.

Step 1: Get a head shot Photo from any Fuji shop. This will be a USA Visa photo and thus requirements are different then an Australian passport photo of 5×5cm. See here for a guide: http://travel.state.gov/visa/guide/guide_3877.html

Step 2: Complete the online DS-160 application form and print the confirmation page. See here: https://ceac.state.gov/genniv/

Step 3: Book an appointment online to your closest U.S. Consulate General. See here: http://sydney.usconsulate.gov/consular/ The wait time is around 2-4 weeks.

Step 4: Pay the application fee of US$131. This can only be done at the Australian Post, you walk in and tell them what you want to pay for. No need for any special document. They act like a holding bank for the US consulate.

Step 5: Gather additional required documents – your employer / attorney will provide these to you in the 1 bundle. These will be the documents the employer would have asked you (see above). You will need these for Step 6.

Step 6: Personally appear at the U.S. Consulate with:

  • Job offer letter,
  • DS-160 confirmation page,
  • Appointment confirmation,
  • Original Australia Post receipt confirming the payment of the Visa application fee,
  • Pre-paid self-addressed envelope (registered post) – make sure it’s those tough plastic envelopes since your passports will be coming back in this,
  • 2 passport sized photos for each required Visa
  • the bundle of documents your employer provided you.
  • and most importantly to get accepted in the interview, make sure you bring documents (evidence) which indicate you intend to return to Australia once employment ceases. This is done through documents like real estate investments, proof of a return airfare or financial ties. A statement is typically adequate. Don’t forget the intend of the E3 and your stay of 2 years.

It’s a bit of work from both sides but in the end it always pays off. Just don’t forget to communicate with your employer (sponsor) to speed up the process of organizing documents.

FAQ

Can I apply for a Green Card on the E3?

  • There are risks. Since E3 is not a dual intent like the H visa’s, i.e. the intention to be here temporarily or to file for a green card. The way around this is to consular process for your green card. As a practical matter, when you have filed the second step of the green card process, you must disclose that on any immigration petition. An officer could decide not to renew the E3 even if you are going to consular process.

What other safer ways can I apply for a Green Card?

  • Ask your employer nicely if they can sponsor you on a H1B. You at maximum 5 months before the E3 expires. This is going to cost them a lot more than the E-3 but is definitely worth it if you and they value each others business.

What is the process of renewing the E-3

  • Start this process with your employer 5 months before your visa expires. You WILL have to leave USA to do this. You can either go back to Australia for a holiday or to Canada and apply at any U.S. Embassy or Consulate which processes non-immigrant petition-based visas. Read this PDF on more detail about extending your E3 visa: http://www.uscis.gov/files/pressrelease/E3_010606PR.pdf

Visa wait times

How long can I stay in the U.S. after I finish my job?

  • You can stay 10 days after you finish your job. This is NOT enough time to transfer your visa to a new employer (unless you started earlier) or apply for a different type of visa. You and your spouse (if under E3D) will be forced to leave the country. This is why you should carefully think about your intent in the USA before committing to anything long-term financially (house) or personally (starting a family).

Finally

Not many employers know what a E3, only H1B visa. If your company sponsored you then they know but if your spouse needs to find work on a E3D,  make sure you can educate them on the whole E3 visa, how it works and it’s similarity to the H1B visa.

If you are interested in the journey my wife had with getting the paperwork and job organized under a E3D visa as an Occupational Therapist then click here to read her story.

Check here for a reliable moving company that can arrange your move to New Zealand or Australia fast and effortless.

Online Resources

E3 Visa Wiki: http://en.wikipedia.org/wiki/E-3_visa

U.S. Consulate Genera in Australia: http://sydney.usconsulate.gov/consular/

Visa Passport requirements: http://travel.state.gov/visa/guide/guide_3877.html

Consulate General of the United States – E3 Visa: http://sydney.usconsulate.gov/consular/visas/niv/e3.html
GROWUSA – International Recruitment agency that specialises in the placement of Australians and New Zealanders to work and live in the USA.
http://www.growusa.com.au/

More Startups. More Jobs. – Support Innovation & Job Creation in America: http://startupvisa.com/

~ Ernest